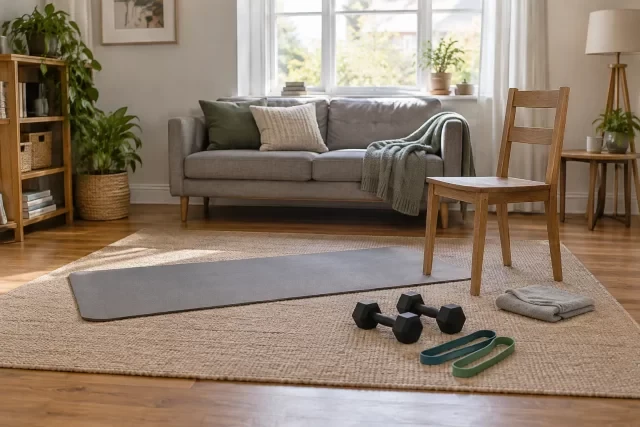
Prepare your workout
- Equipment
- Dumbbells, Wall, Fixed table and Exercise mat
- Before you choose
- General option for adults. Check each exercise's equipment and avoid improvised supports.
- Intensity
- Comfortable load with about 3 reps in reserve. You need not complete every set if technique worsens or you become tired.
- Warm-up
- Before the session, complete one gentle round of the three listed movements. Allow about 6 minutes for preparation, transitions and rehearsing the first exercise; extend this if needed. Rehearse the first exercise with light resistance before its sets, keeping breathing comfortable.
Duration is approximate. Prepare your equipment and take the indicated rests; needing more rest can make the workout longer.
PREPARE TO MOVEYour warm-up
Start with this gentle preparation before your working sets. The listed duration includes the warm-up.
Active walking
60–90 s at a comfortable pace
Choose a clear, safe area and start walking at a comfortable pace. Take regular steps with your arms moving naturally. Keep a pace that allows conversation and slow down to finish.
What you train: Warms up the body and trains arm-leg coordination while walking.
Watch video ↗Side-lying thoracic rotation
1 × 5 gentle repetitions per side
Lie on your side with knees bent and arms in front. Open the upper arm backwards with a gentle rotation of your chest. Close the arm slowly; complete both sides.
What you train: Trains upper-back rotation while your pelvis remains supported.
Watch video ↗Wall push-up
1 × 6 gentle repetitions
Place your hands on the wall at chest height and step slightly back. Bend your elbows to bring your chest towards the wall, keeping your body aligned. Push away to straighten your arms and return.
What you train: Strengthens the chest, triceps and shoulders with less load than floor push-ups.
Watch video ↗
STEP BY STEP
Your complete workout
10 exercises01Gentle wrist mobility
Additional exercise
1 × 6
How to do it- With relaxed arms, gently open and close your hands without maximum squeezing.
- Make small wrist circles within a comfortable range.
- Reverse direction and finish by relaxing hands and forearms.
What it trainsMobilises hands and wrists before gripping or weight-bearing exercises.
- Rest
- Rest 45 s or longer until control returns.
- Tempo
- Controlled, without holding your breath
- Effort reserve
- RIR 3: finish with about 3 repetitions you could still perform with good technique.
The movement, step by step
Relax your arms, open and close hands, and make small, comfortable wrist circles in both directions.
Technique cueKeep movement gentle without forcing end ranges.
Variations and mistakes to avoid
- More accessible
- Reduce resistance and range; keep the movement comfortable and controlled.
- To progress
- Once you complete the prescribed amount with control, add one or two repetitions; then slightly increase resistance.
- Avoid this mistake
- Moving your wrist into a painful end position.
02Shoulder circles
Additional exercise
1 × 6
How to do it- Sit or stand with your arms relaxed at your sides.
- Make small, slow shoulder circles backwards.
- Reverse direction, then let your shoulders relax.
What it trainsGently mobilises the shoulders and shoulder blades before activity.
- Rest
- Rest 45 s or longer until control returns.
- Tempo
- Controlled, without holding your breath
- Effort reserve
- RIR 3: finish with about 3 repetitions you could still perform with good technique.
The movement, step by step
Sitting or standing, let your arms relax. Make small, slow circles with your shoulders backwards, then forwards.
Technique cueKeep your head still and breathe naturally.
Variations and mistakes to avoid
- More accessible
- Make smaller circles.
- To progress
- Make the circles larger only within a comfortable range of movement.
- Avoid this mistake
- Moving abruptly or tensing your neck.
03Dumbbell floor press
Train
2 × 8
How to do it- Lie on your back, knees bent, with dumbbells beside your chest.
- Press the dumbbells upward over your chest.
- Bend your elbows and lower until your upper arms lightly touch the floor.
What it trainsStrengthens the chest and triceps; the floor limits how far you lower.
- Rest
- Rest 45 s or longer until control returns.
- Tempo
- Controlled, without holding your breath
- Effort reserve
- RIR 3: finish with about 3 repetitions you could still perform with good technique.
The movement, step by step
Lie with your knees bent and hold the dumbbells. Press them above your chest, then lower until your arms gently touch the floor.
Technique cueChoose weights you can get into and out of position safely.
Variations and mistakes to avoid
- More accessible
- Practise with very light dumbbells.
- To progress
- Increase the weight slightly without losing control.
- Avoid this mistake
- Hitting the floor with your elbows or holding your breath.
04Dumbbell squeeze floor press
Train
2 × 8
How to do it- Lie with knees bent and dumbbells touching over your chest.
- Bend elbows until the backs of your upper arms lightly touch the floor.
- Press upward to straighten arms, keeping weights together.
What it trainsWorks chest and triceps with the floor limiting depth.
- Rest
- Rest 45 s or longer until control returns.
- Tempo
- Controlled, without holding your breath
- Effort reserve
- RIR 3: finish with about 3 repetitions you could still perform with good technique.
The movement, step by step
Lie with knees bent and dumbbells together over your chest. Lower until your upper arms lightly touch the floor, then press vertically.
Technique cueKeep the dumbbells touching without excessive squeezing.
Variations and mistakes to avoid
- More accessible
- Reduce resistance and range; keep the movement comfortable and controlled.
- To progress
- Once you complete the prescribed amount with control, add one or two repetitions; then slightly increase resistance.
- Avoid this mistake
- Dropping the weights or pressing them together too hard.
05Kneeling push-up
Train
2 × 8
How to do it- Rest hands and knees on a mat, body aligned from knees to head.
- Bend elbows to lower chest with hips and trunk aligned.
- Push through the floor without jutting your head.
What it trainsWorks chest and triceps with less load than a full push-up.
- Rest
- Rest 45 s or longer until control returns.
- Tempo
- Controlled, without holding your breath
- Effort reserve
- RIR 3: finish with about 3 repetitions you could still perform with good technique.
The movement, step by step
Rest on hands and knees with a straight line from knees to head. Bend elbows to lower your chest, then push back.
Technique cueLower chest and hips together with comfortable elbow positioning.
Variations and mistakes to avoid
- More accessible
- Reduce resistance and range; keep the movement comfortable and controlled.
- To progress
- Once you complete the prescribed amount with control, add one or two repetitions; then slightly increase resistance.
- Avoid this mistake
- Bending only at the hips or jutting your head forward.
06Incline push-up
Train
2 × 8
How to do it- Place your hands on a fixed, firm bench and extend your legs behind you.
- Bend your elbows to lower your chest without dropping your hips.
- Push through your hands to straighten your arms.
What it trainsStrengthens the chest and triceps while training trunk control during pushing.
- Rest
- Rest 45 s or longer until control returns.
- Tempo
- Controlled, without holding your breath
- Effort reserve
- RIR 3: finish with about 3 repetitions you could still perform with good technique.
The movement, step by step
Place your hands on a fixed, sturdy surface. Lower your chest towards it, then push up while keeping your body aligned.
Technique cueKeep your head, trunk and hips aligned throughout.
Variations and mistakes to avoid
- More accessible
- Use a higher support.
- To progress
- Gradually lower the height of the support.
- Avoid this mistake
- Letting your hips drop or flaring your elbows too far out.
07Wall shoulder-blade control
Additional exercise
1 × 6
How to do it- Place hands on a wall at shoulder height with elbows straight.
- Let your chest move slightly towards the wall as shoulder blades approach.
- Push the wall away to spread shoulder blades without bending elbows.
What it trainsTrains shoulder-blade control as the chest approaches and leaves the wall.
- Rest
- Rest 45 s or longer until control returns.
- Tempo
- Controlled, without holding your breath
- Effort reserve
- RIR 3: finish with about 3 repetitions you could still perform with good technique.
The movement, step by step
Place hands on a wall at shoulder height. With elbows straight, let the chest move slightly closer, then push away to spread your shoulder blades.
Technique cueMove your shoulder blades with straight arms and a stable waist.
Variations and mistakes to avoid
- More accessible
- Reduce resistance and range; keep the movement comfortable and controlled.
- To progress
- Once you complete the prescribed amount with control, add one or two repetitions; then slightly increase resistance.
- Avoid this mistake
- Sagging through your waist.
08Seated shoulder-blade squeeze
Additional exercise
1 × 6
How to do it- Sit with feet grounded, arms relaxed and shoulders away from ears.
- Gently bring shoulder blades together without arching or lifting your chest.
- Hold three seconds, then fully relax.
What it trainsPractises drawing shoulder blades together with relaxed neck and shoulders.
- Rest
- Rest 45 s or longer until control returns.
- Tempo
- Controlled, without holding your breath
- Effort reserve
- RIR 3: finish with about 3 repetitions you could still perform with good technique.
The movement, step by step
Sit with feet grounded, gently draw shoulder blades together for three seconds, then relax.
Technique cueUse a small movement without maximum squeezing.
Variations and mistakes to avoid
- More accessible
- Reduce resistance and range; keep the movement comfortable and controlled.
- To progress
- Once you complete the prescribed amount with control, add one or two repetitions; then slightly increase resistance.
- Avoid this mistake
- Squeezing maximally or raising your shoulders.
09Unloaded arm opening
Additional exercise
1 × 6
How to do it- Sit or stand with your arms in front at a comfortable height.
- Gently open them sideways without moving your trunk.
- Slowly bring your arms back together in front.
What it trainsTrains shoulder movement and arm coordination without added load.
- Rest
- Rest 45 s or longer until control returns.
- Tempo
- Controlled, without holding your breath
- Effort reserve
- RIR 3: finish with about 3 repetitions you could still perform with good technique.
The movement, step by step
Sitting or standing, gently open your arms at a comfortable height, then bring them back together in front. Keep your shoulders relaxed and torso stable.
Technique cueRelax your shoulders; your hands do not need to go behind your body.
Variations and mistakes to avoid
- More accessible
- Keep your arms below shoulder height.
- To progress
- Add a short pause as you open your arms without arching your back.
- Avoid this mistake
- Forcing your shoulder range or pushing your chest out too far.
10Wall arm slide
Additional exercise
1 × 6
How to do it- Face a wall with hands or forearms resting at a comfortable height.
- Slide your arms upward without arching your back or straining your shoulders.
- Slide back down with control.
What it trainsTrains coordinated shoulder and shoulder-blade movement while raising the arms.
- Rest
- Rest 45 s or longer until control returns.
- Tempo
- Controlled, without holding your breath
- Effort reserve
- RIR 3: finish with about 3 repetitions you could still perform with good technique.
The movement, step by step
Stand facing a wall and rest your hands or forearms on it at a comfortable height. Gently slide them upwards and back down without forcing your shoulders.
Technique cueKeep ribs above your pelvis; you do not need to reach the highest point.
Variations and mistakes to avoid
- More accessible
- Reduce the height of the slide.
- To progress
- Gradually increase the range of movement if you can maintain your posture.
- Avoid this mistake
- Arching your back to reach higher or pushing through discomfort.
Sign in or create your free account to ask Sergio. Read replies in Account → Messages.
FINISH THE SESSIONFinish and prepare your next step.
Walk slowly and breathe comfortably for 2–3 minutes. Allow at least one recovery day before repeating hard strength work for the same muscle group.
Open workout in the app →General routines for adults. If you have a health condition, an injury, are pregnant or have medical instructions, consult your professional before starting and ask for adaptations. Stop if you experience pain, dizziness or unusual breathlessness.