Prepare your workout
- Equipment
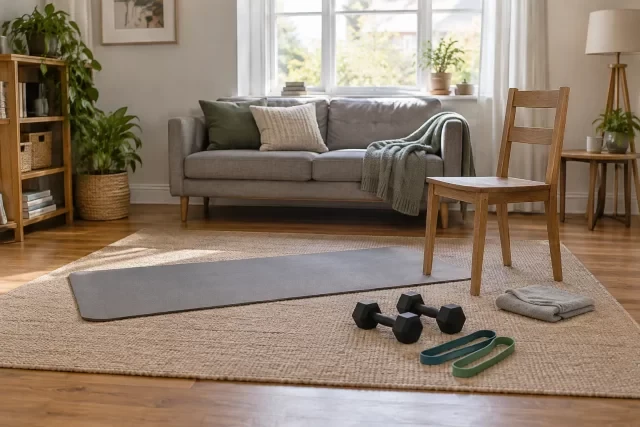
- Dumbbell, Fixed support and Exercise mat
- Before you choose
- General option for adults. Check each exercise's equipment and avoid improvised supports.
- Intensity
- Comfortable load with about 3 reps in reserve. You need not complete every set if technique worsens or you become tired.
- Warm-up
- Before the session, complete one gentle round of the three listed movements. Allow about 6 minutes for preparation, transitions and rehearsing the first exercise; extend this if needed. Rehearse the first exercise with light resistance before its sets, keeping breathing comfortable.
Duration is approximate. Prepare your equipment and take the indicated rests; needing more rest can make the workout longer.
PREPARE TO MOVEYour warm-up
Start with this gentle preparation before your working sets. The listed duration includes the warm-up.
Knee-raise march
60–90 s at a comfortable pace
Stand in a clear area to march on the spot or move slowly forward. Raise one knee comfortably, coordinating the opposite arm. Place the foot down with control and alternate in a steady rhythm.
What you train: Trains arm-leg coordination and balance while raising each knee.
Watch video ↗Quadruped single-arm raise
1 × 6 gentle repetitions
Place hands below shoulders and knees below hips on a mat. Slide one hand forward and lift slightly if your torso stays still. Return it below your shoulder with control and alternate.
What you train: Trains trunk stability when one hand leaves the floor.
Watch video ↗Quadruped leg slide
1 × 6 gentle repetitions
Start on hands and knees, with hands below shoulders. Slide one leg back, keeping its toes on the floor. Slide the foot back until your knee rests, then change sides.
What you train: Trains trunk and pelvic control as one leg slides along the floor.
Watch video ↗
STEP BY STEP
Your complete workout
10 exercises01Shoulder circles
Additional exercise
1 × 6
How to do it- Sit or stand with your arms relaxed at your sides.
- Make small, slow shoulder circles backwards.
- Reverse direction, then let your shoulders relax.
What it trainsGently mobilises the shoulders and shoulder blades before activity.
- Rest
- Rest 45 s or longer until control returns.
- Tempo
- Controlled, without holding your breath
- Effort reserve
- RIR 3: finish with about 3 repetitions you could still perform with good technique.
The movement, step by step
Sitting or standing, let your arms relax. Make small, slow circles with your shoulders backwards, then forwards.
Technique cueKeep your head still and breathe naturally.
Variations and mistakes to avoid
- More accessible
- Make smaller circles.
- To progress
- Make the circles larger only within a comfortable range of movement.
- Avoid this mistake
- Moving abruptly or tensing your neck.
02Quadruped hip rock-back
Additional exercise
1 × 6
How to do it- Start on hands and knees on a mat with a steady back.
- Slowly move your hips towards your heels without lifting your hands.
- Gently bring your hips back over your knees.
What it trainsTrains hip mobility with hand and knee support and little weight on the legs.
- Rest
- Rest 45 s or longer until control returns.
- Tempo
- Controlled, without holding your breath
- Effort reserve
- RIR 3: finish with about 3 repetitions you could still perform with good technique.
The movement, step by step
From your hands and knees, slowly move your hips backwards and return to the starting position.
Technique cueStop where your hips and knees remain comfortable.
Variations and mistakes to avoid
- More accessible
- Reduce the movement and pad your knees.
- To progress
- Add a brief pause at the back.
- Avoid this mistake
- Forcing a painful stretch.
How to do it- Lie on your side, supported on your forearm and the sides of your feet.
- Raise your pelvis to align shoulders, hips and feet without twisting.
- Breathe as you hold; lower with control to finish.
What it trainsTrains side abdominal endurance and pelvic control with a narrow support base.
- Rest
- Rest 45 s or longer until control returns.
- Tempo
- Controlled, without holding your breath
- Effort reserve
- RIR 3: finish with about 3 repetitions you could still perform with good technique.
The movement, step by step
Rest on your forearm and the sides of your feet. Lift your pelvis to form a comfortable straight line, and breathe without rotating.
Technique cuePlace your elbow below your shoulder; stop if alignment is lost.
Variations and mistakes to avoid
- More accessible
- Rest on your knees.
- To progress
- Add a few seconds before changing the variation.
- Avoid this mistake
- Rotating your torso or holding your breath.
How to do it- Hold a dumbbell at one side in a clear space.
- Walk slowly with regular steps and an upright trunk.
- Stop with control and change hands.
What it trainsStrengthens grip and trains the trunk to resist an uneven load while walking.
- Rest
- Rest 45 s or longer until control returns.
- Tempo
- Controlled, without holding your breath
- Effort reserve
- RIR 3: finish with about 3 repetitions you could still perform with good technique.
The movement, step by step
Walk slowly through a clear area holding a dumbbell at one side. Switch hands when you finish.
Technique cueKeep your shoulders level even though only one side carries weight.
Variations and mistakes to avoid
- More accessible
- Reduce the weight and distance.
- To progress
- Increase the time a little while maintaining a natural walking pattern.
- Avoid this mistake
- Leaning your body to compensate for the weight.
05Single-sided load hold
Train
2 × 8
How to do it- Stand holding a closed backpack or light dumbbell beside your body.
- Keep your trunk upright and shoulders level for 15 seconds while breathing.
- Put the load down with control and change hands.
What it trainsTrains grip and trunk resistance to sideways bending.
- Rest
- Rest 45 s or longer until control returns.
- Tempo
- Controlled, without holding your breath
- Effort reserve
- RIR 3: finish with about 3 repetitions you could still perform with good technique.
The movement, step by step
Stand with a light load at one side and keep your trunk upright for 15 seconds. Put the load down and change sides.
Technique cueAvoid leaning towards or away from the weight.
Variations and mistakes to avoid
- More accessible
- Reduce resistance and range; keep the movement comfortable and controlled.
- To progress
- Once you complete the prescribed amount with control, add one or two repetitions; then slightly increase resistance.
- Avoid this mistake
- Holding your breath or choosing excessive weight.
06Alternating dead bug
Train
2 × 8
How to do it- Lie on your back with arms towards the ceiling and knees bent.
- Slowly extend one arm and the opposite leg without moving your pelvis.
- Return with control and repeat on the opposite side.
What it trainsTrains abdominal control while the arms and legs move.
- Rest
- Rest 45 s or longer until control returns.
- Tempo
- Controlled, without holding your breath
- Effort reserve
- RIR 3: finish with about 3 repetitions you could still perform with good technique.
The movement, step by step
Lie with your arms raised and knees bent. Slowly reach your opposite arm and leg away, then return.
Technique cueShorten the range if your back cannot stay comfortable.
Variations and mistakes to avoid
- More accessible
- Move only one leg or slide your heel.
- To progress
- Extend your limbs a little further without losing control.
- Avoid this mistake
- Holding your breath or moving your pelvis.
07Glute bridge
Additional exercise
1 × 6
How to do it- Lie on your back with knees bent and both feet grounded.
- Push through your feet and raise your pelvis, gently squeezing your glutes.
- Lower your pelvis with control onto the mat.
What it trainsStrengthens the glutes through hip extension from the floor.
- Rest
- Rest 45 s or longer until control returns.
- Tempo
- Controlled, without holding your breath
- Effort reserve
- RIR 3: finish with about 3 repetitions you could still perform with good technique.
The movement, step by step
Lie with your feet on the floor and knees bent. Lift your pelvis and lower with control.
Technique cueStop rising when your hips and trunk are aligned.
Variations and mistakes to avoid
- More accessible
- Use a smaller range of movement.
- To progress
- Add a two-second pause at the top.
- Avoid this mistake
- Lifting your pelvis by overextending your back.
08Heel slide
Additional exercise
1 × 6
How to do it- Lie on your back with knees bent and both feet grounded.
- Slide one heel away without moving your pelvis.
- Bring it back with control and alternate legs.
What it trainsTrains abdominal control while one leg moves and your pelvis stays steady.
- Rest
- Rest 45 s or longer until control returns.
- Tempo
- Controlled, without holding your breath
- Effort reserve
- RIR 3: finish with about 3 repetitions you could still perform with good technique.
The movement, step by step
Lie on your back with your knees bent and both feet on the floor. Slide one heel away and bring it back without moving your pelvis. Alternate sides.
Technique cueExhale gently as the foot slides away; shorten the range if your back arches.
Variations and mistakes to avoid
- More accessible
- Slide your foot a shorter distance.
- To progress
- Gradually increase the range of movement while maintaining control.
- Avoid this mistake
- Arching your back or holding your breath to reach further.
09Arms-only dead bug
Additional exercise
1 × 6
How to do it- Lie on your back, knees bent, feet grounded and arms towards the ceiling.
- Move one arm back towards your head while gently breathing out.
- Return upward and alternate, preserving your natural back position.
What it trainsTrains trunk control while moving an arm with feet supported.
- Rest
- Rest 45 s or longer until control returns.
- Tempo
- Controlled, without holding your breath
- Effort reserve
- RIR 3: finish with about 3 repetitions you could still perform with good technique.
The movement, step by step
Lie with knees bent and feet grounded. Exhale while moving one arm back within a comfortable range; return and alternate.
Technique cueShorten the arm range if ribs lift or your back moves.
Variations and mistakes to avoid
- More accessible
- Reduce resistance and range; keep the movement comfortable and controlled.
- To progress
- Once you complete the prescribed amount with control, add one or two repetitions; then slightly increase resistance.
- Avoid this mistake
- Forcefully pressing your back into the floor or holding your breath.
10Calm standing breathing
Additional exercise
1 × 6
How to do it- Stand with feet firm, knees relaxed and shoulders down.
- Breathe in comfortably without shrugging or maximally filling your lungs.
- Exhale slowly and repeat the cycles in your session.
What it trainsPractises calm standing breathing and awareness of chest and rib movement.
- Rest
- Rest 45 s or longer until control returns.
- Tempo
- Controlled, without holding your breath
- Effort reserve
- RIR 3: finish with about 3 repetitions you could still perform with good technique.
The movement, step by step
With feet firm and knees relaxed, inhale without shrugging and exhale slowly. Complete five comfortable cycles.
Technique cueUse a natural rhythm without forcing air in or out.
Variations and mistakes to avoid
- More accessible
- Reduce resistance and range; keep the movement comfortable and controlled.
- To progress
- Once you complete the prescribed amount with control, add one or two repetitions; then slightly increase resistance.
- Avoid this mistake
- Becoming dizzy through breathing too fast.
FINISH THE SESSIONFinish and prepare your next step.
Walk slowly and breathe comfortably for 2–3 minutes. Allow at least one recovery day before repeating hard strength work for the same muscle group.
Open workout in the app →General routines for adults. If you have a health condition, an injury, are pregnant or have medical instructions, consult your professional before starting and ask for adaptations. Stop if you experience pain, dizziness or unusual breathlessness.