Prepare your workout
- Equipment
- Adjustable dumbbells with sufficient load, Firm support and Exercise mat; Stable wall for supplementary exercises
- Before you choose
- For regular trainees with established technique in every movement who can estimate remaining repetitions. Dumbbells must provide sufficient load: finishing with much more reserve makes this less than advanced for you. Learn new movements with supervision first.
- Intensity
- RIR 2 means finishing able to do about 2 more good repetitions. Main sets should be challenging without failure. Preserve posture and breathing in holds and carries; prioritise speed and quality in jumps.
- Warm-up
- Before the session, complete one gentle round of the three listed movements. Allow about 8 minutes for preparation, transitions and rehearsing the first exercise; extend this if needed. Add 2–3 gradual warm-up sets for the first loaded exercise, well below fatigue, and one rehearsal of the first unfamiliar pattern. These are not work sets.
Duration is approximate. Prepare your equipment and take the indicated rests; needing more rest can make the workout longer.
PREPARE TO MOVEYour warm-up
Start with this gentle preparation before your working sets. The listed duration includes the warm-up.
Knee-raise march
60–90 s at a comfortable pace
Stand in a clear area to march on the spot or move slowly forward. Raise one knee comfortably, coordinating the opposite arm. Place the foot down with control and alternate in a steady rhythm.
What you train: Trains arm-leg coordination and balance while raising each knee.
Watch video ↗Supported side leg raise
1 × 5 gentle repetitions per side
Stand holding a fixed support with both feet facing forward. Lift one leg slightly sideways without leaning your trunk. Lower slowly and complete the other side.
What you train: Strengthens the side hip muscles and trains pelvic control.
Watch video ↗Toe and foot-arch control
1 × 5 gentle shifts onto the toes
Sit with feet grounded and toes relaxed, without loading the outer foot edge. Lift only the big toe, keeping the other four down. Lower it and lift the other toes; alternate slowly, using a hand if needed.
What you train: Trains independent toe control and awareness of foot contact.
Watch video ↗
STEP BY STEP
Your complete workout
9 exercises01Goblet squat
3 × 5–8 · RIR 2
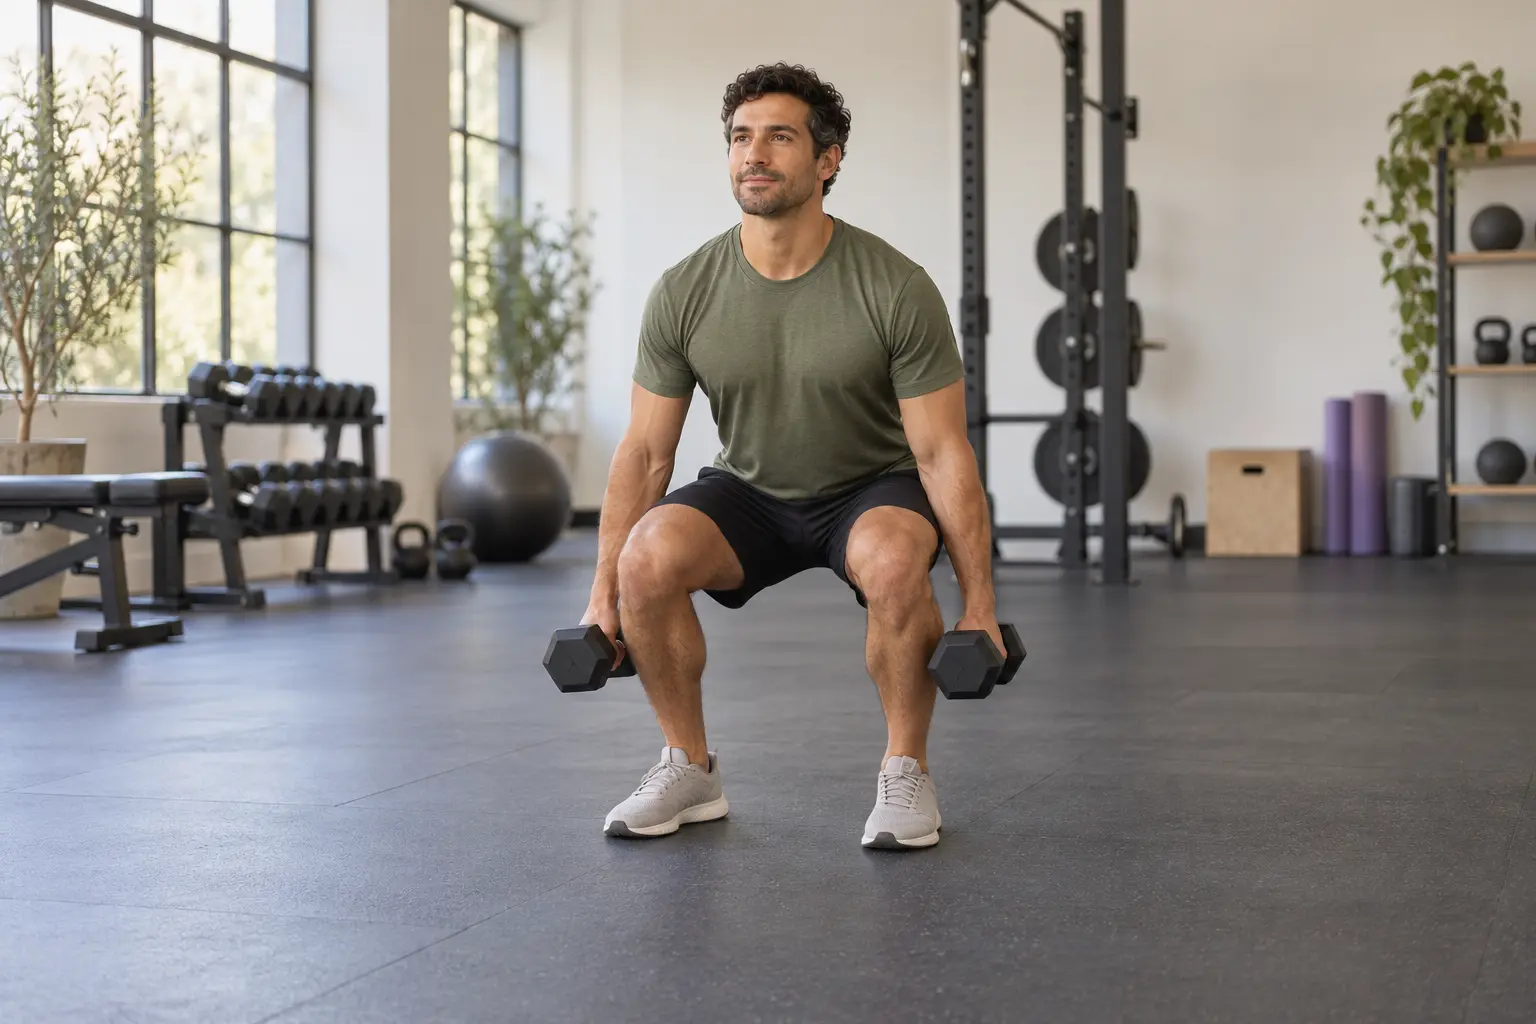
How to do it- Hold the dumbbell close to your chest and keep both feet firmly on the floor.
- Bend your hips and knees to lower to a depth you can control.
- Push through the floor to rise without losing your range or torso position.
What it trainsStrengthens the quadriceps and glutes while your trunk supports the weight.
- Rest
- Rest 180 s between sets. Extend the pause if you cannot repeat the technique.
- Tempo
- 2 s lowering · no bouncing · firm ascent
- Effort reserve
- RIR 2: finish with about 2 repetitions you could still perform with good technique.
The movement, step by step
Hold a dumbbell close to your chest with both feet firm. Lower between your hips to a depth you can control, then rise with your torso steady. Use a load that makes the final repetitions challenging without losing your range.
Technique cueThe weight should make the final repetitions challenging without forcing you to shorten the lowering phase.
Variations and mistakes to avoid
- More accessible
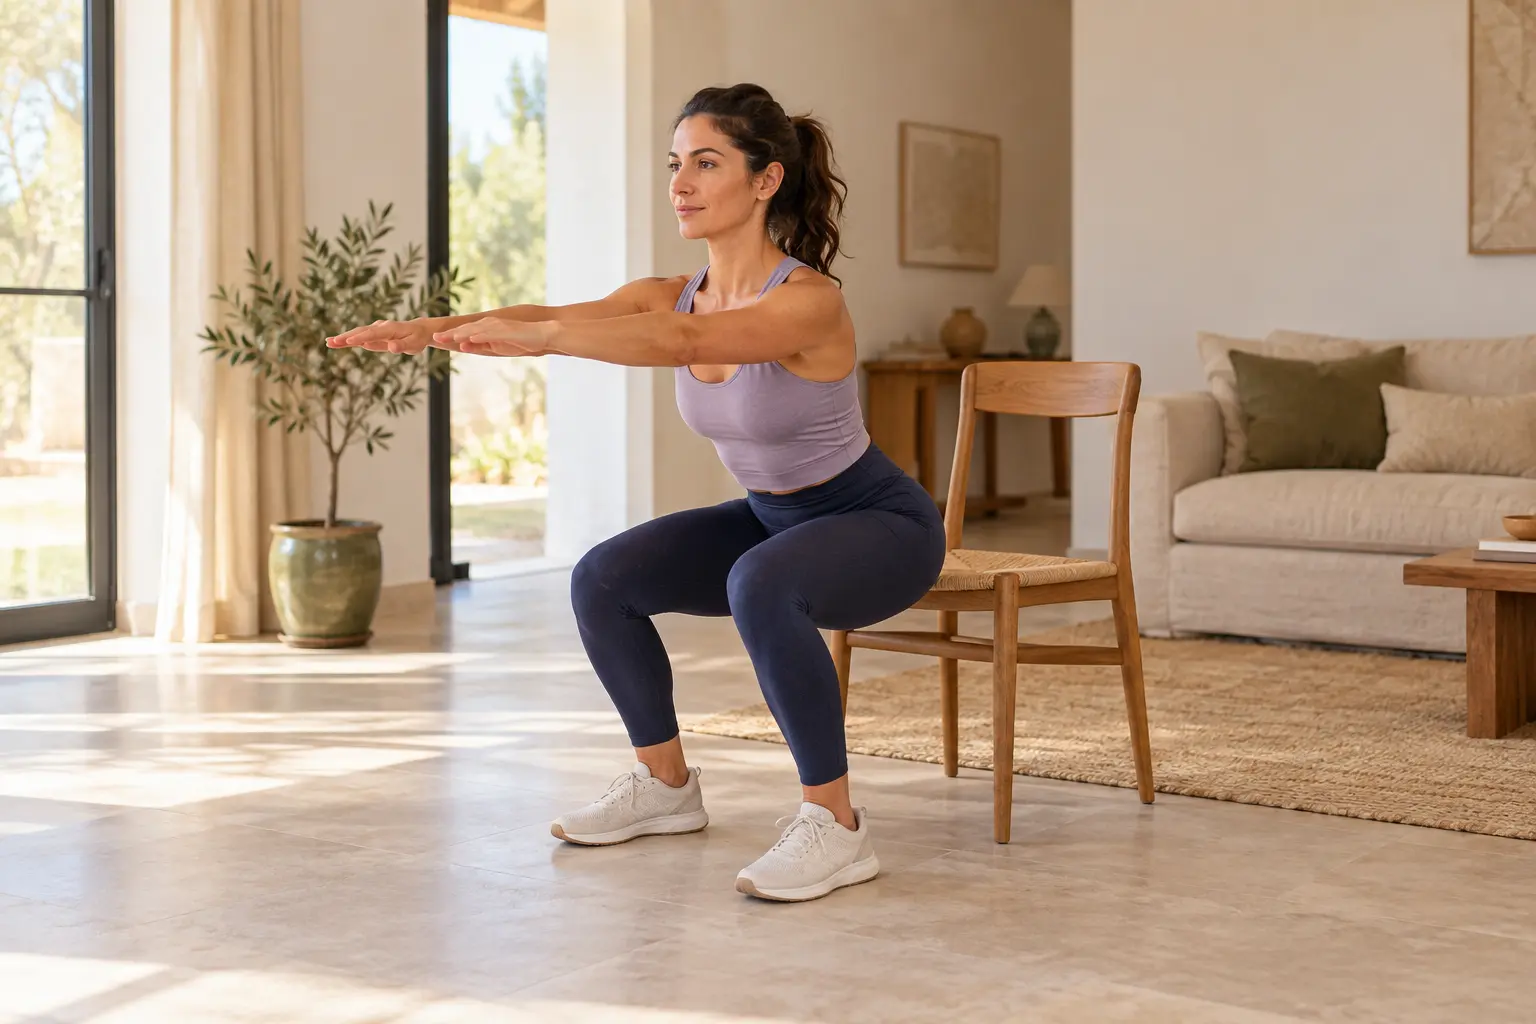
- Squat to a chair without added weight.
- To progress
- After completing the top of the range in every set with the stated RIR across two sessions, add the smallest available weight increment and return to the bottom of the range.
- Avoid this mistake
- Lifting your heels or dropping without control.
02Dumbbell Romanian deadlift
3 × 6–8 · RIR 2
How to do it- Hold two dumbbells close to your thighs and bend your knees slightly.
- Move your hips back and lower the weights close to your legs without rounding your back.
- Stop lowering before you lose hip control, then stand up by extending your hips.
What it trainsStrengthens the glutes and hamstrings and teaches lifting from the hips.
- Rest
- Rest 180 s between sets. Extend the pause if you cannot repeat the technique.
- Tempo
- 2 s lowering · no bouncing · firm ascent
- Effort reserve
- RIR 2: finish with about 2 repetitions you could still perform with good technique.
The movement, step by step
Hold two dumbbells and bend your knees slightly, then move your hips back without rounding your back. Keep the weights close to your legs and return by extending your hips. Stop lowering when you can no longer move your hips with control.
Technique cueYour range ends where you can still move from your hips with a stable back.
Variations and mistakes to avoid
- More accessible
- Practise an unweighted hip hinge beside a wall.
- To progress
- After completing the top of the range in every set with the stated RIR across two sessions, add the smallest available weight increment and return to the bottom of the range.
- Avoid this mistake
- Rounding your back or trying to reach the floor at all costs.
03Split squat
3 × 6–8 per side · RIR 2
How to do it- Hold a dumbbell at each side and place one foot forward and one back, with a wide base.
- Lower your pelvis straight down by bending both knees, keeping your feet in place.
- Rise by pushing mainly through your front leg; complete one side before switching.
What it trainsBuilds strength in each leg with a weight on both sides and your feet kept in place.
- Rest
- Rest 150 s between sets after completing both sides; take 15–30 s to switch sides. Extend the pause if you cannot repeat the technique.
- Tempo
- 2 s lowering · no bouncing · firm ascent
- Effort reserve
- RIR 2: finish with about 2 repetitions you could still perform with good technique.
The movement, step by step
Hold dumbbells on both sides and take a fixed split stance with enough width. Lower vertically and push mainly through your front leg. Complete one side, then the other, with the same number of repetitions.
Technique cueDo the same number of repetitions on each leg and keep your pelvis facing forwards.
Variations and mistakes to avoid
- More accessible
- Use one hand for support and reduce the range of movement.
- To progress
- After completing the top of the range in every set with the stated RIR across two sessions, add the smallest available weight increment and return to the bottom of the range.
- Avoid this mistake
- Using such a narrow stance that you lose your balance.
04Reverse lunge
2 × 8–10 per side · RIR 2
How to do it- Hold the dumbbells at your sides and stand with a stable base.
- Step backwards, lower with control and return by pushing through your front leg.
- Complete that side before switching; if fatigue worsens your technique, end this accessory exercise.
What it trainsWorks your legs and glutes with added weight, completing each side separately and managing fatigue.
- Rest
- Rest 120 s between sets after completing both sides; take 15–30 s to switch sides. Extend the pause if you cannot repeat the technique.
- Tempo
- 2 s lowering · no bouncing · firm ascent
- Effort reserve
- RIR 2: finish with about 2 repetitions you could still perform with good technique.
The movement, step by step
Hold dumbbells at your sides, step backwards, lower with control and return by pushing through your front leg. Complete one side before switching. If fatigue reduces your technique, finish this accessory exercise rather than adding repetitions.
Technique cueDo not add repetitions once movement quality is declining.
Variations and mistakes to avoid
- More accessible
- Do a supported split squat.
- To progress
- After completing the top of the range in every set with the stated RIR across two sessions, add the smallest available weight increment and return to the bottom of the range.
- Avoid this mistake
- Rushing the movement or letting your knee collapse inwards.
05Single-leg calf raise
2 × 10–15 per side · RIR 1
How to do it- Hold a fixed support with one hand and a dumbbell in the other; shift your weight onto one leg.
- Raise the heel of your supporting leg and pause at the top without swaying.
- Lower slowly until your heel rests on the floor, using a range you can control.
What it trainsWorks one calf with added weight and hand support to control your balance.
- Rest
- Rest 90 s between sets after completing both sides; take 15–30 s to switch sides. Extend the pause if you cannot repeat the technique.
- Tempo
- 2 s lowering · no bouncing · firm ascent
- Effort reserve
- RIR 1: finish with about 1 repetitions you could still perform with good technique.
The movement, step by step
Hold a fixed support with one hand and a dumbbell in the other, then raise the heel of the working leg. Pause at the top and lower slowly until your heel is supported. Use a range you can control, without bouncing.
Technique cueKeep your hand on the support throughout each repetition.
Variations and mistakes to avoid
- More accessible
- Use both feet.
- To progress
- After completing the top of the range in every set with the stated RIR across two sessions, add the smallest available weight increment and return to the bottom of the range.
- Avoid this mistake
- Bouncing to complete the final repetitions.
06Single-leg bridge
2 × 10–15 per side · RIR 2
How to do it- Lie on your back with one knee bent and its foot planted.
- Unweight the other leg and push through the planted foot to raise your pelvis.
- Lower slowly without rotating your hips; complete the other side.
What it trainsStrengthens the supporting leg's glutes and trains a level pelvis.
- Rest
- Rest 90 s between sets after completing both sides; take 15–30 s to switch sides. Extend the pause if you cannot repeat the technique.
- Tempo
- 2 s lowering · 2 s at the top
- Effort reserve
- RIR 2: finish with about 2 repetitions you could still perform with good technique.
The movement, step by step
From a bridge, take the weight off one leg and lift your pelvis with the other foot planted. Lower slowly and switch sides.
Technique cueKeep both hips at the same height as you rise.
Variations and mistakes to avoid
- More accessible
- Return to a bridge with both feet planted.
- To progress
- After completing the top of the range in every set with the stated RIR across two sessions, add the smallest available weight increment and return to the bottom of the range.
- Avoid this mistake
- Rotating your pelvis or straining your neck.
07Suitcase carry
2 × 30–45 s each side
How to do it- Hold a dumbbell at one side in a clear space.
- Walk slowly with regular steps and an upright trunk.
- Stop with control and change hands.
What it trainsStrengthens grip and trains the trunk to resist an uneven load while walking.
- Rest
- Rest 90 s between sets after completing both sides; take 15–30 s to switch sides.
- Tempo
- Continuous breathing · steady posture · no swaying
The movement, step by step
Walk slowly through a clear area holding a dumbbell at one side. Switch hands when you finish.
Technique cueKeep your shoulders level even though only one side carries weight.
Variations and mistakes to avoid
- More accessible
- Reduce the weight and distance.
- To progress
- After reaching the upper time limit in all sets across two sessions, slightly increase the load or lever while returning to the initial duration.
- Avoid this mistake
- Leaning your body to compensate for the weight.
How to do it- Support yourself on forearms and toes, with elbows below shoulders.
- Raise your body, aligning head, trunk and hips without sagging.
- Breathe for the prescribed time, then lower your knees with control.
What it trainsTrains abdominal endurance to hold the body aligned.
- Rest
- Rest 75 s between sets.
- Tempo
- Continuous breathing · steady posture · no swaying
The movement, step by step
Rest on your forearms and toes. Keep your torso stable for a short hold and breathe normally.
Technique cueEnd the hold when you can no longer maintain a stable position.
Variations and mistakes to avoid
- More accessible
- Do it against a wall or with your knees on the floor.
- To progress
- After reaching the upper time limit in all sets across two sessions, slightly increase the load or lever while returning to the initial duration.
- Avoid this mistake
- Letting your lower back sag or raising your hips too high.
09Shoulder circles
Additional exercise
1 × 5
How to do it- Sit or stand with your arms relaxed at your sides.
- Make small, slow shoulder circles backwards.
- Reverse direction, then let your shoulders relax.
What it trainsGently mobilises the shoulders and shoulder blades before activity.
- Rest
- Rest 30 s or longer until control returns.
- Tempo
- Controlled, without holding your breath
- Effort reserve
- RIR 3: finish with about 3 repetitions you could still perform with good technique.
The movement, step by step
Sitting or standing, let your arms relax. Make small, slow circles with your shoulders backwards, then forwards.
Technique cueKeep your head still and breathe naturally.
Variations and mistakes to avoid
- More accessible
- Make smaller circles.
- To progress
- Make the circles larger only within a comfortable range of movement.
- Avoid this mistake
- Moving abruptly or tensing your neck.
Sign in or create your free account to ask Sergio. Read replies in Account → Messages.
FINISH THE SESSIONFinish and prepare your next step.
Walk or cycle gently for 3–5 minutes. Duration includes warm-up, sets and suggested rest; allow longer if needed. Let the muscles recover before another similar hard session.
How to progress
Record weight, reps and effort reserve. Keep the load until you reach the top of the range in every set with the intended RIR for two sessions. Then add the smallest available increment and return to the lower end. Reduce load if you miss the minimum or lose technique. Do not add this on top of another hard session for the same muscles.
Open workout in the app →TRAIN CONSISTENTLYThis routine is part of…
Sets and effort can change from week to week in a program. Open the session from the program to follow its stage’s guidance.
General routines for adults. If you have a health condition, an injury, are pregnant or have medical instructions, consult your professional before starting and ask for adaptations. Stop if you experience pain, dizziness or unusual breathlessness.